Browsing Tag

Design

Maker Stories

Meet Naomi Meller, iPhone Case Design Challenge Winner

June 29, 2012

Every new design challenge fills us with such excitement! It is inspiring to see the passion, emotion, and wit in the artists’ stories behind their unique designs. The iPhone Case Design Challenge brought in over 100 entries and the opportunity for artists to share the paintings, sketches, and graphic designs they have created.

Our judges worked through designs with unique mediums, bold colors, and uplifting stories. They decided on pieces that they thought America would love for their whimsy, and others they thought would inspire iPhone case envy. But there was one piece that the judges couldn’t get off their minds; they loved its wit and clever juxtaposition of technology on technology.

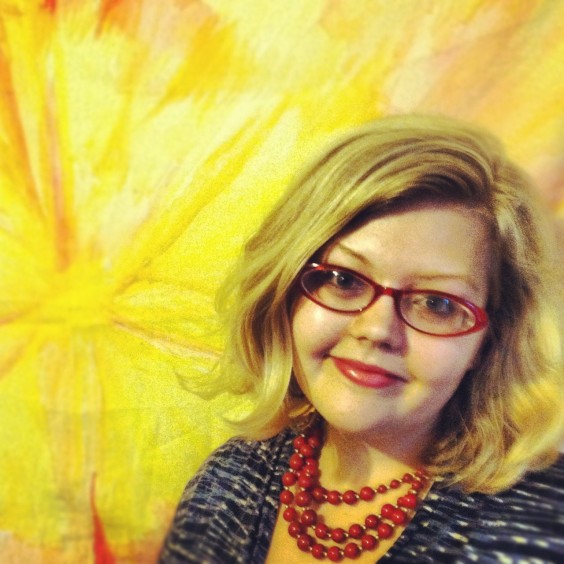
We simply love the clever geeky chic of Computer iPhone and cannot wait for you to learn more about its designer, our iPhone Case Design Challenge winner, Naomi Meller of Rhode Island. Naomi recently rediscovered her love of art and designing through photography and will soon be able to see her designs on the backs of iPhones all over the country. Meet Naomi, the newest addition to our Uncommon Artists family.

When and how did you discover art?

I’ve been involved with art for as long as I can remember. As a very young child, I drew elaborate pictures that often caught the attention of my teachers. This evolved into years of drawing and painting, usually for it’s therapeutic value. As I’ve gotten older, I’ve realized that I don’t want to keep it all to myself.

How did you realize that photography was your passion?

Photography was one of the only mediums I had never experimented with. When I had my daughter over 2 years ago, I got very sick and came close to losing my life. The months following were difficult, and I was physically weak. I tried to walk around a lot to build stamina.
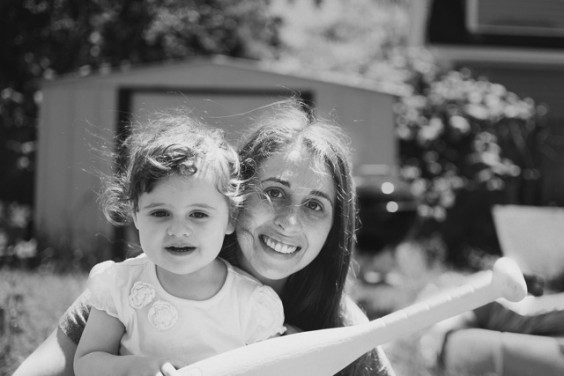
During my walks, I started taking pictures with my iPhone. I fell in love with these photo walks I’d take, and decided to buy a dSLR to take my photography to the next level. I’m stubborn, and sometimes that can be a good quality. I set out to learn how to properly use my camera, and I did. Since I started taking pictures, my passion for taking them has only grown.

What are your favorite things to design/photograph?

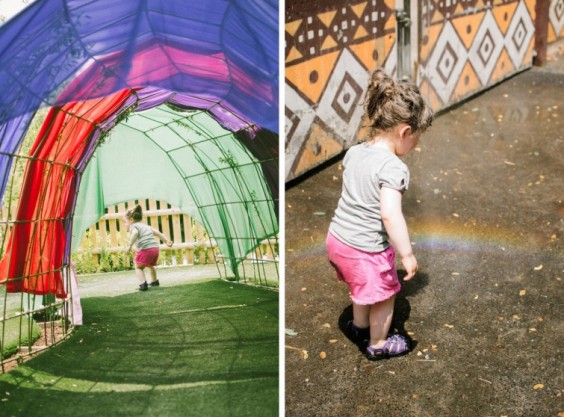
My number one favorite thing to photograph is my daughter. Kids grow so quickly that I just want to capture all the good/bad/and in between moments of her growth.

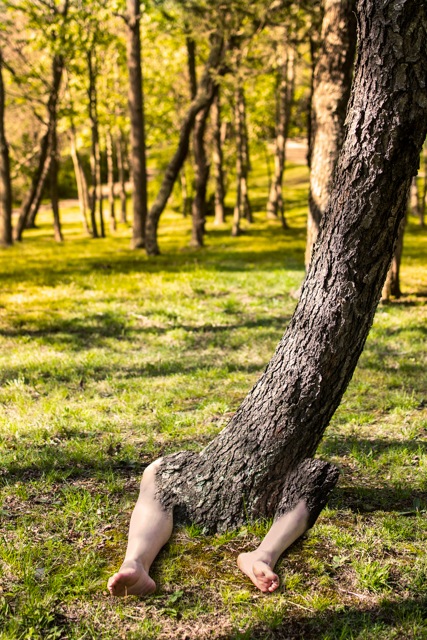
I also love to create characters in my self-portraits. This allows me to step outside of myself, become someone different, and express myself in a raw and comfortable manner that I hadn’t been able to in years.

How do you keep yourself inspired?

I never stick to one style of photography. And I never stick to one type of subject. Some weeks I’ll take portraits of our family. Some weeks I’ll focus entirely on surreal self-portraits. On occasion I’ll do some photojournalism work for my husband’s news site. By always changing my subjects, I’m always changing my perspective. And it keeps me going.
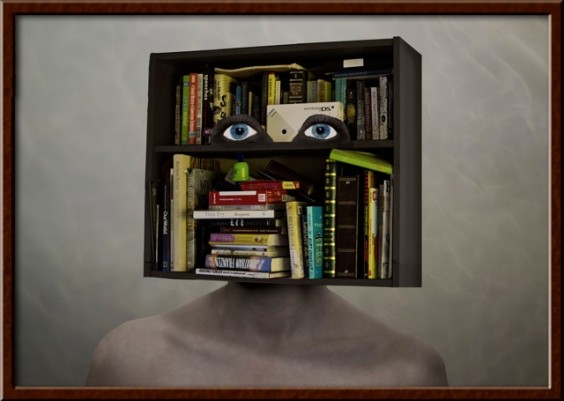
I also love challenging myself in Photoshop. I taught myself how to use the program by way of trial and error. Sometimes I’ll take a picture, and work on it until I’ve succeeded in something I didn’t know how to do before sitting down. Currently I’m trying to master an old film camera that my dad gave me. I always keep things evolving, always keep learning – that way I avoid feeling stagnant.

How else do you express your art?

I’ve recently started a photography blog to help publicize my work, but also to inspire myself to start writing again. Writing is something that I did creatively for a long time, but haven’t much in the last several years.

I’ve also picked up a paint brush again. I have an earlier photograph in which I combined painting and a surreal self-portrait. I hadn’t picked up a paint brush in a long time. I still have several canvases in my house just calling my name!

What attracted you to want to take part in this challenge?

Aside from the fact that I’m a huge UncommonGoods fan, over the last few months I’d been feeling much more anxious about getting my work out there. I’ve been creating things for over 20 years, and the only person in my way has been me. I thought that this challenge would be a great opportunity with a great company.
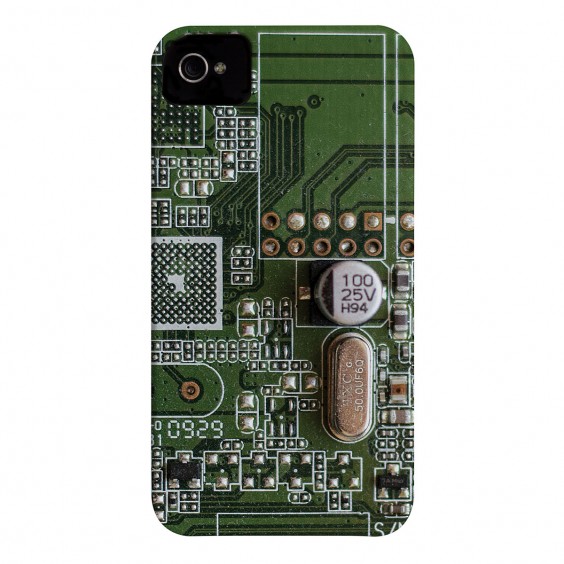
What was the inspiration behind Computer iPhone?

Most of the work that I’m most proud of has come from a quick decision. When I over think and over analyze, it usually harms the outcome of a piece. Computer iPhone came about because my husband had recently dismantled a broken computer. Pieces were surrounding the office we share. I had submitted some other designs, but they were very portrait based. For Computer iPhone, I thought, “what would look cool, hold up well to wear, and still portray the irony that I always have in my work?”. And so I decided on a piece of the computer.

Do you have any advice for someone interested in taking part in a future challenge?

Don’t doubt yourself. If you enter a future challenge, and don’t make it through, the worst case scenario is that you can try again. I did.

All photos courtesy of Naomi Meller

Design

Noteworthy Design: Wedding Wishes

June 8, 2012

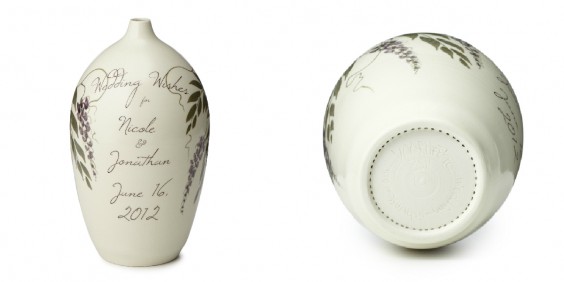
Picking a personal wedding gift is tricky. It has to be sentimental, but not too cheesy. Functional, but with more appeal than the stereotypical kitchen appliance. And, of course, it should be something the couple will cherish for years to come. Our community agrees, David Voorhees’ Personalized Wedding Wishes Vase has it all.

Time and skill go into creating each of these wheel-formed, hand-decorated pieces, but using the finished product is actually quite simple. Each vase comes with a wedding poem (written by Voorhees) and blank sheets for writing your own wedding wishes.

The couple can use the vase instead of a traditional guest book, or place it near the guest book table. As guests enter the reception, they are asked to write their very own special messages to the couple and drop them into the vase for the newlyweds to read on their first anniversary. Since the bottom of the vase is perforated, the artwork doesn’t have to be destroyed for the messages to be enjoyed a year later.


Our buyers loved the handmade vase the moment they laid eyes on it, but wanted a little “relationship advice” before making the commitment to carrying this uncommon good. Our voters agreed that the custom creation is certainly something special.

“This is a really great idea, beautiful and made in the USA,” Christie told us.

Renee agreed, “I think it sounds like a great idea, and gives lots of warm thoughts on the 1st anniversary…”

“I love the idea of opening this on the couple’s first anniversary! The perforated bottom is fabulous, since I would hate to wreck the vessel otherwise,” said Alli.

Now Voorhee’s design is an UncommonGood, and it’s receiving fantastic reviews from those celebrating the marriages of loved ones in their lives.

“This was the perfect answer for a wedding gift for a couple who were older, found love again, had two households to contend with and needed no more appliances or other like items,” explained Judy the aunt from Long Beach, CA. “Family and friends were able to write notes they will open in a year. What a nice way to wish a new happy couple on their way.”

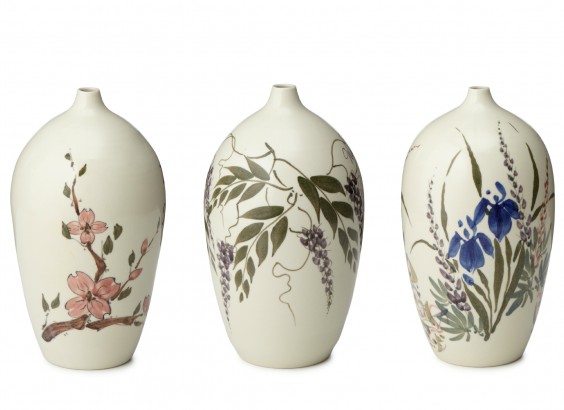
Mary from Ashville, NC also shared a 5-star review: “This is my absolute favorite wedding gift to give! It is a beautifully hand thrown vase that has a personalized message on one side with a floral design hand painted on the other side. At the reception, guests are encouraged to write a personal hand written message to the couple on paper and put it into the Wedding Wish Vase. Then, a year later, on the couples first wedding anniversary, they open the vase and read all the messages the guests wrote to them on their wedding night! How awesome!! This is such a lovely, unique, personalized, meaningful wedding gift.”

We’re proud to see such wonderful feedback coming in for such a clever and beautiful handmade piece. We’re looking forward to feedback from happy couples as they open their Wedding Wishes Vases to read warm messages and words of wisdom in years to come!

The Uncommon Life

DIY Bridal Survival Kit

June 8, 2012

Hello Uncommon Goods blog readers! I’m Laura from A Girl Who Makes. I am here to share an easy yet necessary wedding day survival kit with you. Wedding days are memorable and can also be hectic. A survival kit for brides and/or bridesmaids will be a helpful gift to keep everyone calm and prepared. I’ve put together a little survival kit of some much needed essentials, but these kits can be customized easily by the contents put in the box.

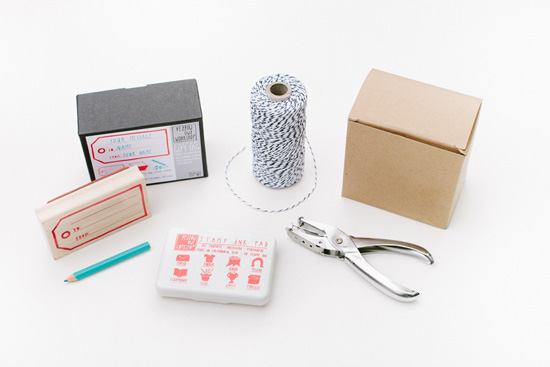
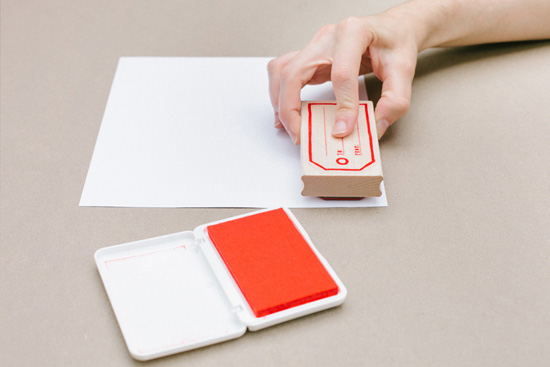
MATERIALS: Gift Tag Stamp Set, twine or string, hole punch, card stock, scissors, and a box to hold items for the kit.

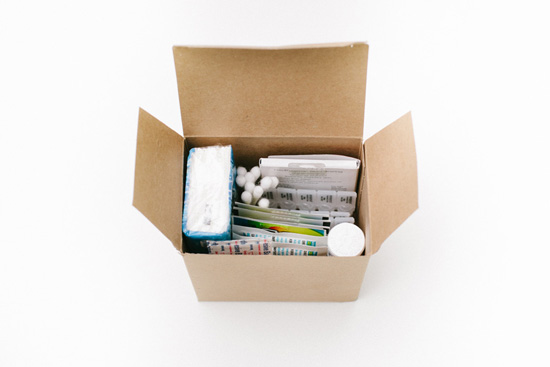
STEP 1: Fill the box with the chosen essentials. I included tissues, stain remover, cotton swabs, mints, bandages and some lip gloss.

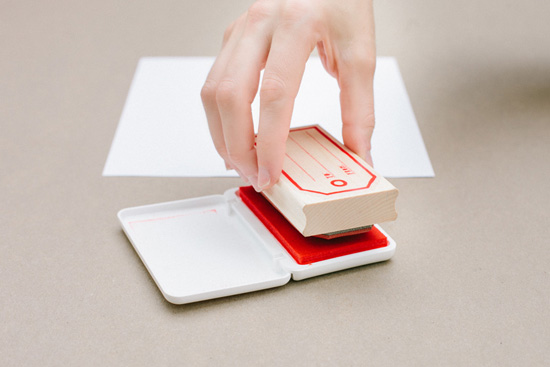
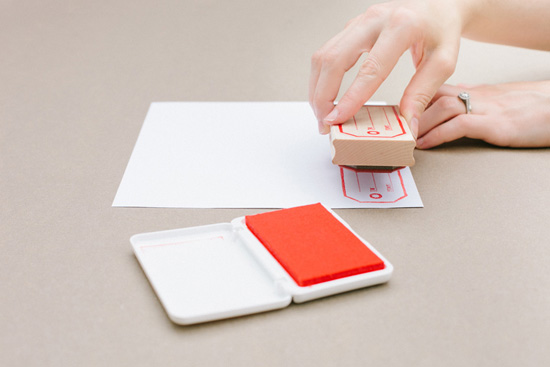
STEP 2: Using the stamp set, ink the stamp and press it onto the card stock, making sure to have full coverage on the stamp. Press evenly when the stamp is on the ink pad as well as when the stamp is on the card stock. When lifting the stamp, be sure to lift straight up so you don’t smudge the paper.

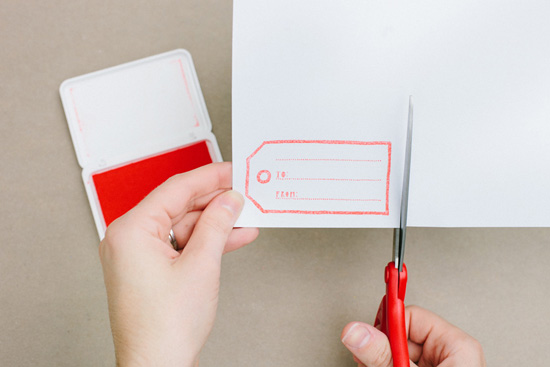
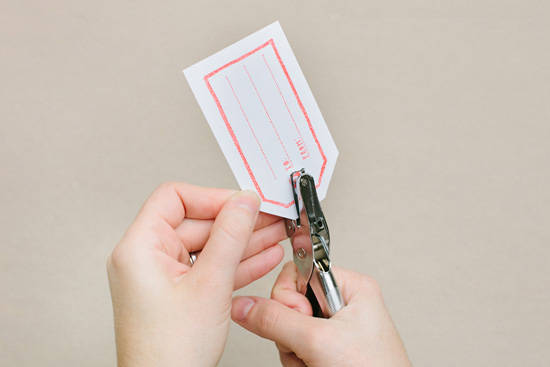
STEP 3: Trim the gift tag using scissors to the size you would like. Also using a hole punch, make a hole in the tag as well.

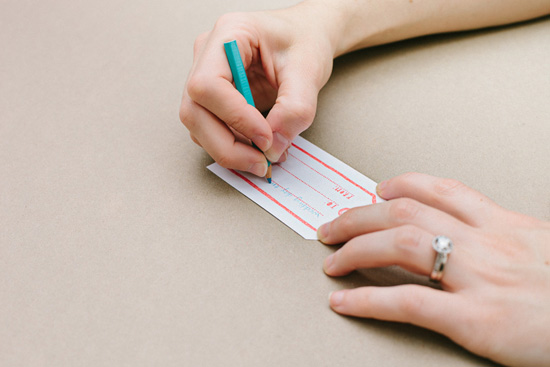
STEP 4: Using the pencil from the Gift Tag Stamp Set, fill out the tag.

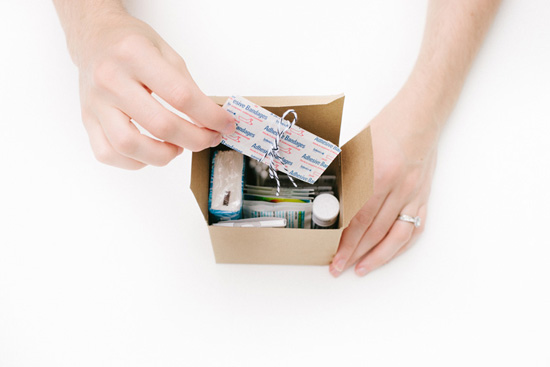
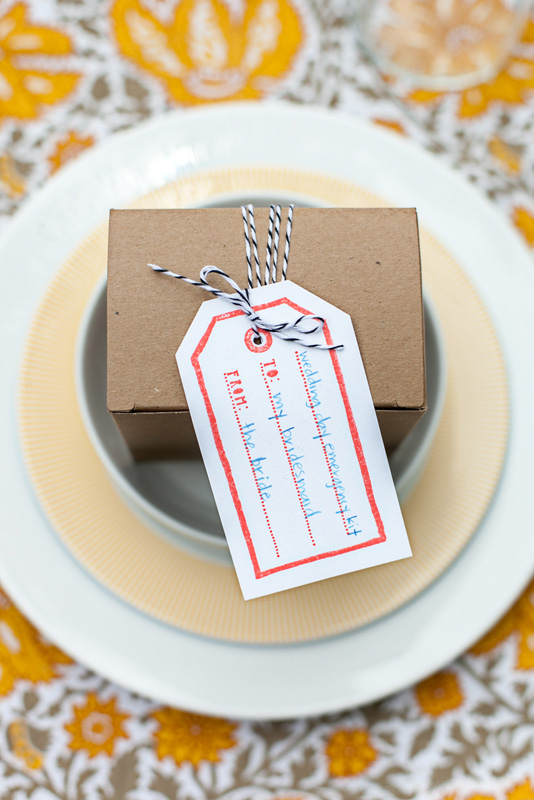
STEP 5: Take a piece of twine or string that measures about 1 yard and wrap it around the box several times. String the tag onto the twine and tie in a bow to complete the box.

The Uncommon Life

How To Repot Succulents

June 8, 2012

In the world of trends, Succulent plants seem to be taking home the crown in the fauna and flora category. And why shouldn’t they? Succulents are hardy, unique, and perfect for the dry summer heat. They don’t ask for much, but a good environment No green thumb needed — follow this quick DIY tutorial to repot your succulents and ready for your front porch or city window.

As Charlotte (you know, the one with the web) would say, Salutations! I’m Blair – the bloggin’ gal from the lifestyle and fashion blog, Wild and Precious and now that I’ve introduced myself lets chat about a way to spruce up that patio of yours!

Mix Your Potting Soil

Potting soil recipe:

  • Potting Soil
  • Coffee Grinds
  • Sand

Did you make mudpies growing up? If so, this might be your favorite part — make your own dirt mixture! When picking out potting soil just get the very most basic stuff. You don’t want anything too rich in additives — Succulents just don’t like that stuff. The goal of your dirt mixture is to get water/food/light/nutrients to and away from the roots in a time appropriate fashion. Mix coffee grinds and a little sand into your dirt before filling your pots. The sand will keep your soil from getting too over saturated with moisture (remember, these type of plants are desert dwellers – they aren’t use to a whole lot of the wet stuff) and the coffee grinds will help fertilize as well as keep away slugs and bugs that would otherwise love to nibble your Succulents down to nothingness.


Prepare Your Pot

As far as picking out pots the world is your oyster. You don’t need anything too big and can even choose to put more than one succulent together in a pot. With your pot(s) picked out fill 1/3 of each pot with sand. Do not try to cut costs (sand is cheap anyway) by bringing home sand from your beach vacation — that stuff is full of salt and your succulents will no longer be… well, succulent. Sand is important in helping move around and drain water. Once you’ve got the sand in, fill with your dirt mixture leaving a small lip of space up top.

Prepare Your Succulent

Before introducing your plants to their new home give the bottom of the existing dirts/roots a bit of a scrunch. Flare the root structure out a bit. This will help it transition better into its new/bigger/better environment. This is something good to remember when planting anything anywhere. If you don’t break up the bundle they are used to having in their temporary store shells, they might be a little too shy to branch out (pun intended) into their new world.

Pot Your Succulent

Now — where to put them? These guys are not fans of the midday sun. They prefer indirect/filtered sunlight and enjoy a nice airflow (I chose to put mine on my front porch which is roofed). As for watering — unlike planting in your garden, you do not want to water these right away after repotting. Give them some time to adjust and then give a good watering about once a week during the warmer months. Don’t ever leave standing water in your pots — it makes them angry.

Wham bam thank you ma’am we have ourselves some repotted Succulents! Call your self hip cause you’ve got the trendiest little plants on the block. Mischief managed!

Thanks for hanging out with me — pop over any time to say hi Wild & Precious. ta ta friends.

Ready to get started? Shop planters at UncommonGoods >>

The 10 Best Indoor Succulents | Indoor Plant Tips | UncommonGoods

Check out this INFOGRAPHIC to discover the perfect succulent for you. (No green thumb needed.)

Maker Stories

Inside the Designer’s Studio with Dolan Geiman

June 4, 2012

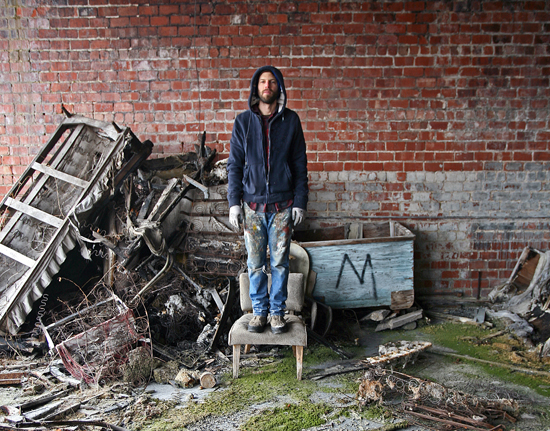
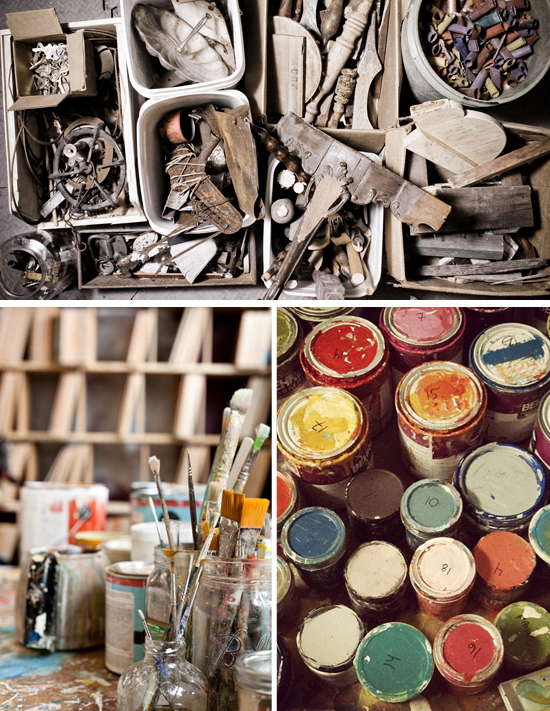
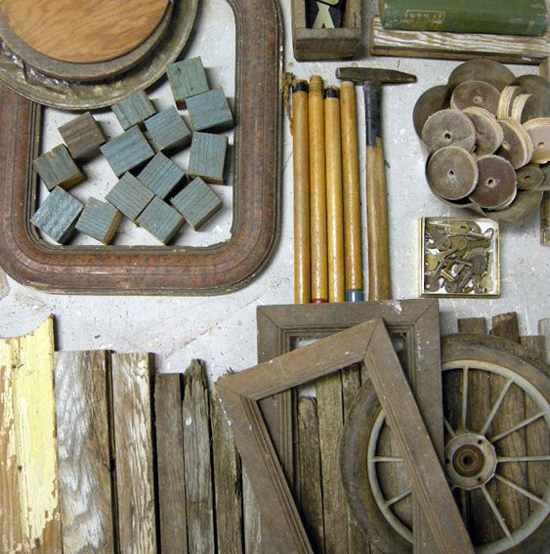
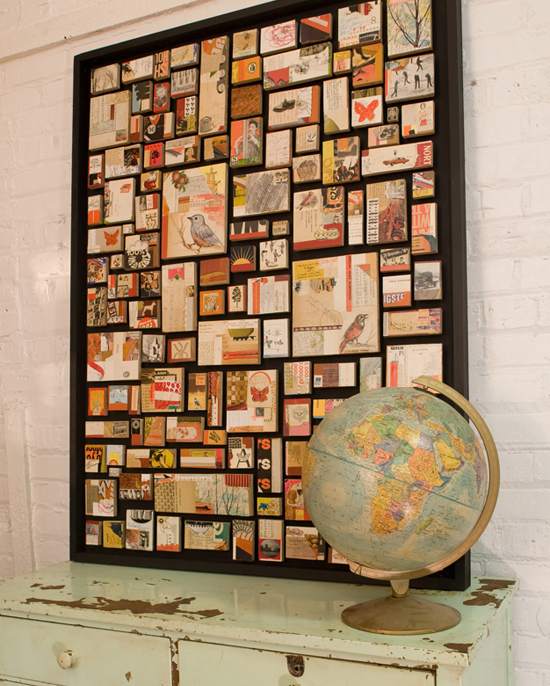
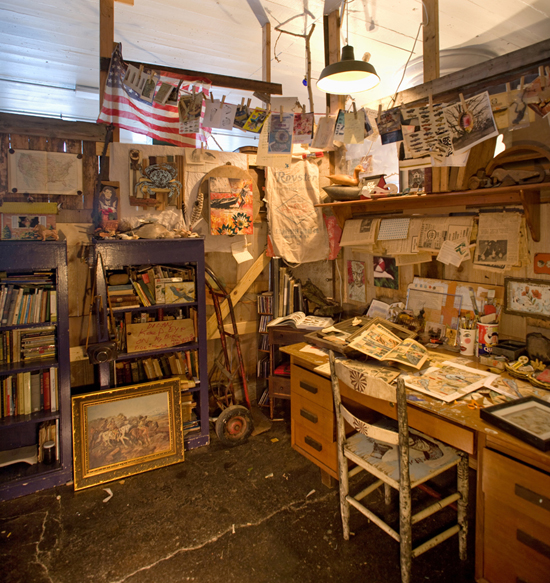
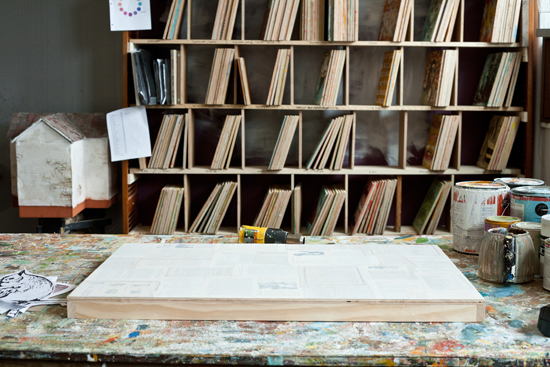
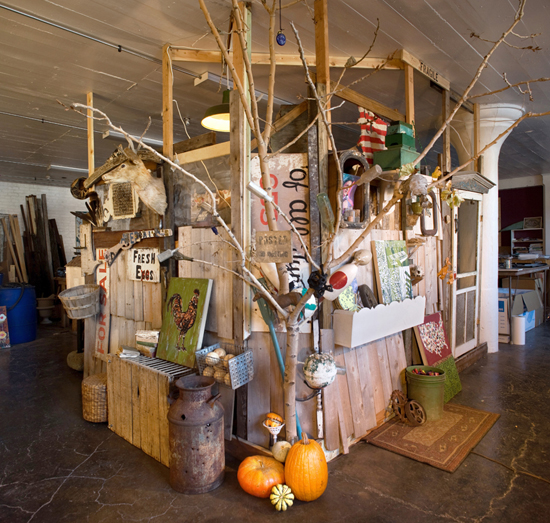
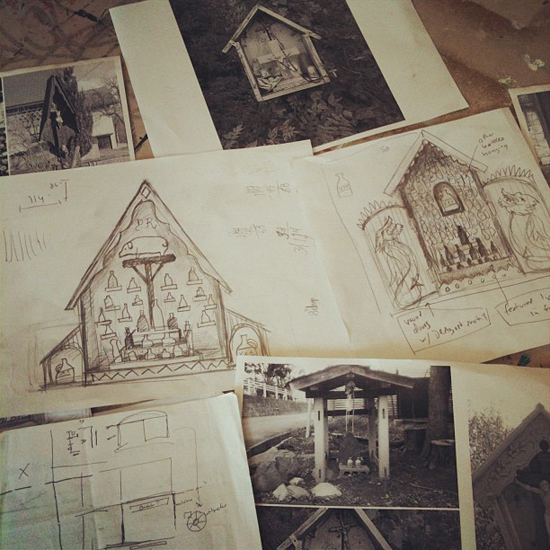
With artists throughout the 50 states, being able to visit the studio of each designer is a valuable, but more often unlikely opportunity. However, sometimes an opportunity lends itself to step inside the mind of an artist without ever setting foot in their hometown. Dolan Geiman is a mixed media designer who marries found objects and iconic imagery in his pieces. He generously takes us on our first remote studio tour and shares his tools, tricks and inspirations through photos of his space and in his owns words.

What are your most essential tools for creating your art?
The tools I find most essential for creating my artwork are as follows, in this order:
apple pie, crisp warm days, cool nights, bluegrass and country music, a clear mind, and a vision of the finished project. Other tools are easier to obtain.

Where do you find inspiration within your workspace?
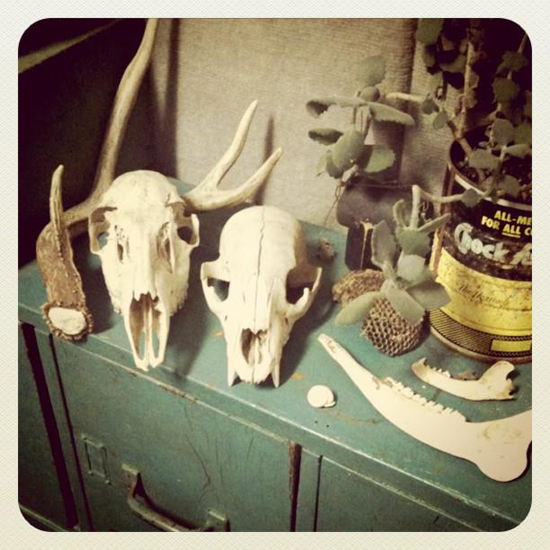
I keep artifacts around my studio that give me energy and creative power: a turtle shell, a cow skull, a box of fasteners my sister sent me from Prague, a collection of pine cones and bird nests, a box of civil war buttons and old watches. Things that have energy and I can plug into them like one might plug a Norelco into a bathroom socket.

Where does down time fit into a day in the studio?
Well, there is not a whole lot of downtime for me. I think it’s that way when you run your own business. A lot of peers tell me in in their wispy yoga voices “Ahh, you just have to make time for yourself.” Yeah, it ain’t that easy. So, I take time at the end of a few months of hard labor. I’m trying to eek out a few moments early in the morning to walk and look at birds. But for now, while the work is there, I will be there holding its hand or holding its head while it throws up.

What was the toughest lesson you learned as a young designer starting a business?
I never learned how to say “no” earlier in my career. It’s nice to say no. It helps you to stay sane. It’s hard if you are broke, but don’t ever let people take advantage of your creativity in that way.

What advice would you offer yourself 5 years ago?
Charge more for your services. And stop smoking cigarettes. And move to the country. And get a damn haircut.

How do you set goals for yourself?
I basically keep this little treasure chest in my head and on the front of the chest is a goal. When I complete the goal I get to open the treasure chest. It’s usually full of wine and beer and a few days of fly fishing in the mountains. I try to set goals that are attainable but very difficult. And I do weekly, monthly, and yearly goals.

How and when do you decide to celebrate a victory?
Well, I used to celebrate more but then I married my business partner and that put a damper on the celebrations… haha. I like to celebrate after I complete a successful project or a milestone in the business. I think I appreciate these things because I’m more of a stop-and-smell-the-roses kind of person. And it also helps mentally, and mental health is something I take very seriously. If you just keep doing these cool things and then don’t stop to look at what you’ve done and where you’ve been then five years goes by and you are just older and not any happier.

What quote keeps you motivated? What does that quote mean to you?
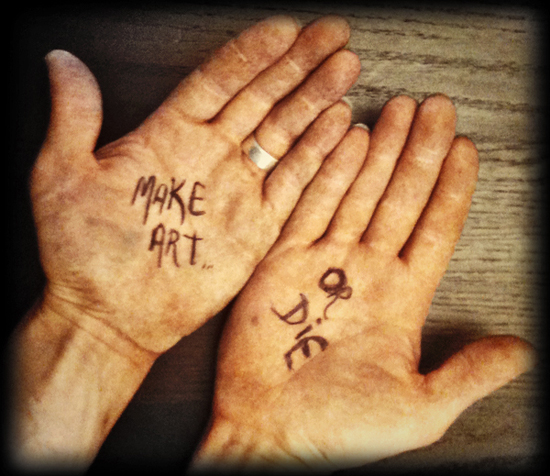
I have this quote that I say to myself which is like my mental tattoo – “make art or die” – because if I stop making art I will most likely die. Like a pancake without syrup. Useless and not making anyone happy.

What are some new skills you are trying to acquire to perfect your craft?
I am trying to learn more about woodworking and creating antiqued finishes. I rely on the spoken advice of my peers and colleagues for this. There are two nice woodworkers in the basement studio below my studio so I often pick their brains for advice.

How do you recharge your creativity?
I go fishing or hiking or camping or bird watching or anything in the woods for at least several days. I’m trying harder and harder to re-charge my creativity these days, since I feel like I am working harder and harder. I have had several mental breakdowns in the past five years, due mostly to the fact that I work way too much. But this is the burden of being a Libra blessed with creativity. It’s a blessing and a curse… and a curse. I find the best recharging happens when I am far from other people and just staring at something like a cloud or an ant or a cloud that is shaped like an ant. I often meditate in nature and will create an entire novel in my mind which I try to slowly erase until there is nothing but… nothing. Meditation is hard.

Where does collaboration come into play with your craft?
I am not really sure. I like to collaborate with other folks, but I think mostly the collaboration is more conversational. When I am around other artists that I enjoy, we often create nice mind energy conversations and the mood is good and so I feel like we are all collaborating on a conversation and it’s like we are pooling our positive energy into the physical space. It’s more of a Jungian thing. When you leave the space of being around good people, smart and interesting people, there is energy there and you can draw on that later. It’s a similar feeling to déjà-vu, perhaps a cousin of déjà-vu. But in reverse.


photos by Dolan Geiman, Eric Grimes, Chris Nightengale, David Schalliol, and Paul Zimmerman

Maker Stories

Matthew Amey’s ‘End of Innocence’ Jumps into our Collection

May 23, 2012

With every new design challenge comes the chance to step into the minds and lives of some of America’s budding designers. The Wall Art challenge brought in over 100 entries and an opportunity for artists to tell a personal story through the paintings, sketches and digital graphics they have created.

Our judges worked through art with sentimental stories, unusual mediums and contemporary themes. They decided on some pieces that they could see hanging in the homes of many Americans yet others they loved for their niche attraction. But the piece that stole their heart was one about the uncertainty in change and straddled a fine line between hopeful and ominous.

The more we learn about Wall Art Challenge winner Matthew Amey of Maryland, the more we love End of Innocence: Jump Off and can’t wait to share its story with customers. Matthew heard about our design challenge from his wife who encourages him to share his work with others in new and exciting ways and will soon be able to say that his work is on the walls of homes across the country. Meet Matthew, our Wall Art Design Challenge winner and the newest addition to the Uncommon Artists family.

When and how did you discover art?
As a young child I took art classes during summer camp and was thrilled with the freedom that was afforded us to create whatever we wanted. My older brother was much more astute at drawing than I was so, as a challenge to myself, I set out to be a better artist than him. I believe I was 7.

What are your favorite things to design/illustrate?
My interests are many and diverse. I’ve spent the last four years studying fine art at the University of Delaware where I’ve been exposed to a plethora of techniques, materials and insight into the concept of a fine art profession.

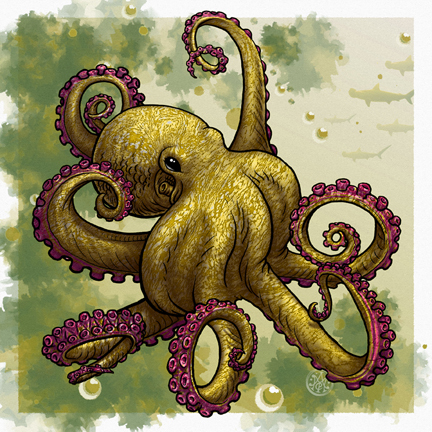
Recently I have been enamored with cephalopods; octopuses especially but I’ve been researching and becoming more interested in cuttlefish and squid.

How do you keep yourself inspired?
I am constantly thinking of what to do next. Dwelling on past achievements, while ingratiating, can be burdensome. The process of making art, the actual moving of paint around on canvas, pushing a pencil across paper, or drawing with a stylus on a drawing tablet to create digital works, is what drives me to create more. While I enjoy the finished pieces and I’m excited to see how others react to my work, I am more enamored with the actual creation of the work. I started out as a doodler and dabbler but that has turned into a profession that is quite fulfilling.
How else do you express your art?
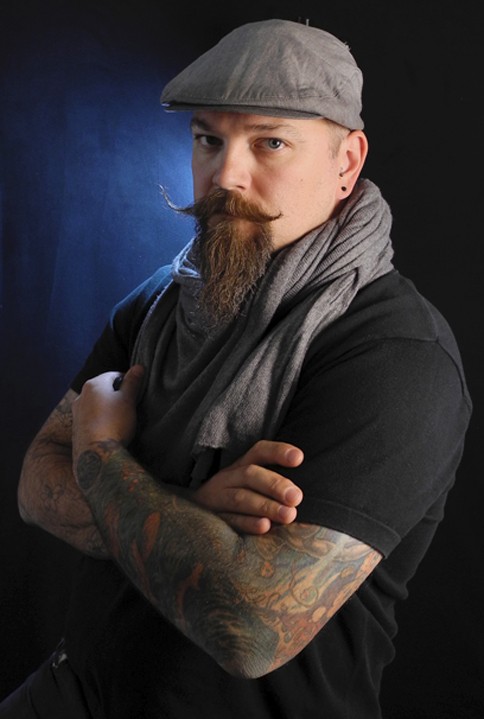
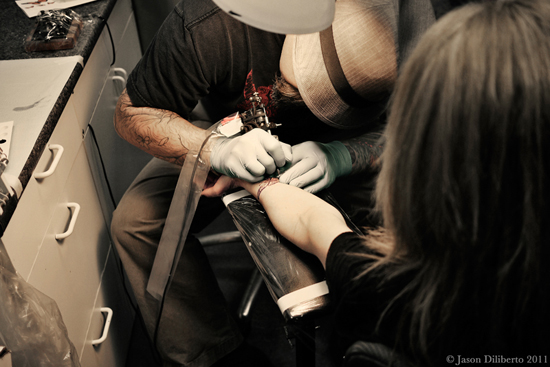
I have been a professional tattoo artist since 1991 and much of my work is informed from that experience. Tattoos are a very personal expression for my clients. I have built a reputation for creating high quality work in the skin and my clients know that my work excels when they give me artistic freedom to work within their design parameters.

As a tattoo artist it is very apparent that my job is to help my client express their ideas on their body. Often it is an opportunity for me to explore many different ideas, compositions and concepts that I wouldn’t normally investigate.


What attracted you to want to take part in this challenge?
My wife knew that I was searching for outlets to show my non-tattoo related artwork and she turned me on to this contest. I happened to have these illustrations that are part of a series that I recently created.


What was the inspiration behind End of Innocence?
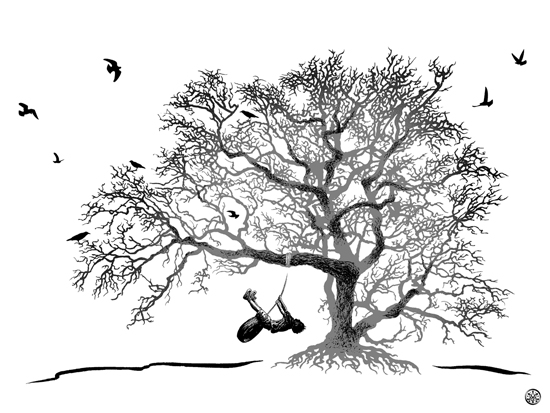
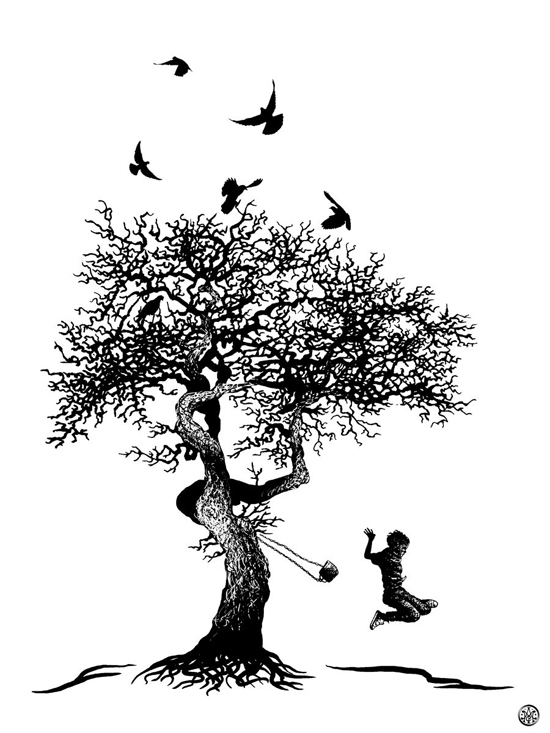
In 2008 I returned to college after a 20 year hiatus. While studying fine art at the University of Delaware it became apparent that I was surrounded by young, soon-to-be adults who were going through some major emotional and physical changes. One day a tattoo client of mine requested an image of his daughter on a rope swing under the silhouette of a tree. After doing the tattoo on him I started to think about the image and how it had the potential to tell a more compelling story. I started putting together images of different trees with children on rope swings and ended up with a series of 5 disparate images.

Each image has a tree, a child either on the swing or jumping off, and varying types of birds either in flight or perched on a branch. The tree represents stability, safety, comfort, excitement and all the positive attributes of a loving family. The child is enjoying the ride and seems oblivious to what lies just outside of the trees reach, the future. The birds represent the varying societal norms that the child could eventually grow into.

Any advice for someone interesting in taking part in a future challenge?
Take a chance. You’ll never know how your work will affect others until you put it in front of them.

All photos courtesy of Matthew Amey.

Design

Moodboard Tutorial from Inspired to Share

May 21, 2012
image by Woodnote Photography


My name is Colleen and I am the creator of design and lifestyle Inspired to Share. I’ve been blogging for three years now and it has continually sparked my interest and desire to learn more about graphic design. I now find myself playing in Photoshop every day and I love experimenting in design to create original blog content. One of my favorite posts to create is a mood board. Lately, every Monday I’ve been posting a “Monday Mood Board” blog post as a way to share inspiration that I’ve discovered around the web. Mood boards are a great way to do more than just look at inspiration, but to really make it your own. I also find they can help with developing projects and concepts. I don’t know about you, but I spend a lot of time on Pinterest. Sometimes I want to look at multiple pins of images at the same time, so that I can see them all together. Or maybe I want to show my own interpretation of the images. For example, say I’m creating a concept for a new style post, a mood board can help serve to refine my ideas and vision. I like to gather inspiration everywhere, including everything from art, interiors, photography, styling to design and typography. Mood boards bring all of these areas together while formulating my overall aesthetic and color scheme. It’s really quite fun! Plus, I know I love looking at others’ designed mood boards, and they always inspire in new ways.

So now that you know why mood boards are so great, let’s create one!

1. The very first step is also the longest: selecting inspiration photos for the mood board. I like to turn music on that inspires me (lately I’m obsessed with this website) while I look. There are endless sources of inspiration on the Internet, and I think we all could spend days looking for cool and creative finds! I usually peruse other blogs and Pinterest to look for photos that catch my eye, doing my best to hunt down the original sources. I usually select anywhere from 5-10 photos.

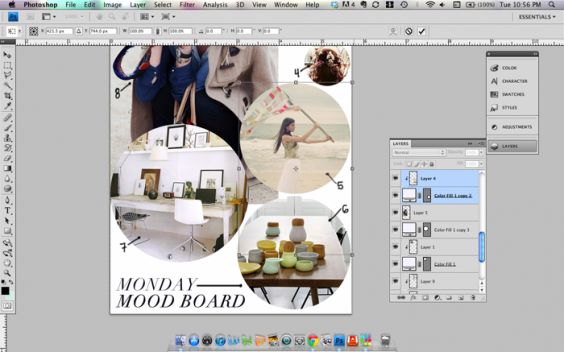
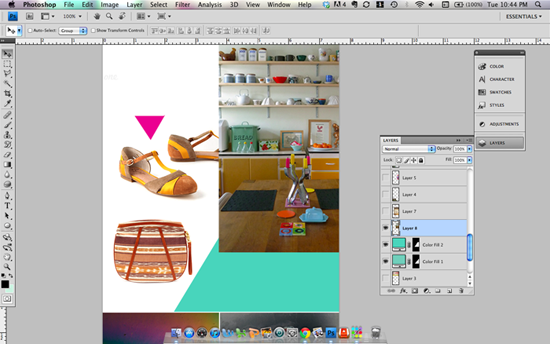
2. Next, drag all the photos into Photoshop and put them on one canvas. Simply dragging the photos from your browser into Photoshop saves the step of saving each individual file and reopening it in Photoshop! And putting them on one canvas begins the process of designing the images together. I’ve found it’s helpful to work on a square canvas in Photoshop so that I don’t feel confined to the narrow dimensions for my blog.

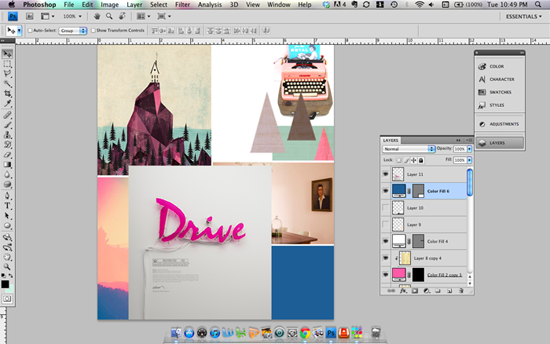
3. Begin to arrange the photos and create your own layout. One technique I recommend is to fit images inside shapes according to the size and area you need to fill. That way you can fit all of the photos even if they don’t match the exact dimensions of your canvas.The options are endless. You can add borders, numbers, shapes, textures, type, and writing or drawing (I like to use my Wacom tablet!). This is the fun part! Be creative and have fun with it. There are no rules! Below are some screen shots of my mood boards in progress.

4. If you decide to share your mood board anywhere online, make sure you credit the original photo sources and link to where you found each image. This is an important step not to be overlooked! I try to find the original source of all photos, if possible (Pinterest doesn’t count!). Original sources so helpful when reading other blogs and it’s important to give credit where credit is due.
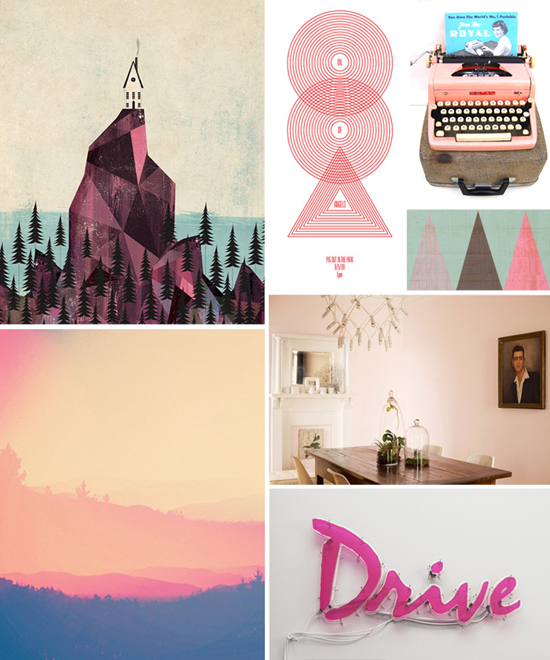
I always try to add a little something new in my designs to keep it fresh. Below is an example of a finished mood board that I made recently.


(sources: art by Andrew Bannecker, design by Nick Tibbetts, typewriter from joe vintage, photo via mr. serio, sfgirlbybay’s home by bonnie tsang, sign by Rizon Parein)

I hope you’re inspired to make your own mood board! I’d love to hear if you have any tips or tricks as well.
A big thanks to UncommonGoods for having me! Now go get inspired! xo

The Uncommon Life

Giveaway: Show Us Your Colorful Mug Shot!

May 18, 2012

The original Face Mug has gotten a lot of attention since he first looked at us with those wide eyes, flashed that perfect (for stuffing with cookies) smile, and landed in our lineup.

We’ve heard gifting stories of how he’s made loved ones laugh, suggestions for filling him with different drink and treat combos, and some interesting alternate uses–like a business card holder with candy on top or a cheerful place to pot a plant. But one thing we’ve heard time and time again is that folks would love to see this character in color.

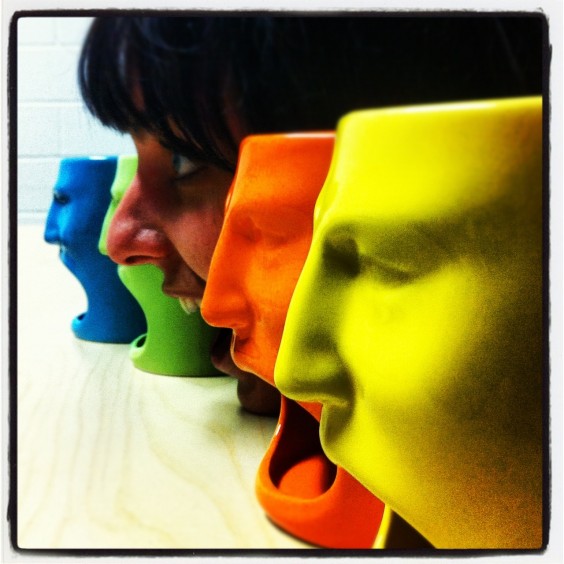
While Mr. Mug isn’t exactly on hand in color just yet, he is available for purchase on pre-sale and can be yours as a set of two in warm or cool colors. And, to add to the fun, we’re giving away all four to one winner!

Entering is easy. Just send us your best, most colorful mug shot. Use colorful props, bright outfits, and bold backgrounds. Or, take a photo with a color-altering Instagram filter, edit with your favorite program, or come up with something even more creative!

Post the photo to our Facebook timeline and we will post it in our Show Us Your Colorful Mug Shot album.  Share it with your friends and get them to “like” and comment on your photo. Tell your friends to tell two friends and so on, and so on… because the photo that gets the most Facebook love wins a set of these technicolor mug!

We’ll announce the winner on June 1, so start snapping, editing, and spreading the word!